
Enabling Customer Portal Filters for Passes
Customer Portal filters help customers quickly find passes based on specific categories. By creating a tag and enabling it as a customer portal filter, you can improve the browsing experience and make it easier for customers to discover the most relevant passes.
How to Enable a Customer Portal Filter
To create and enable a customer portal filter for passes:
- Navigate to CRM from the side menu.
- Select Tags.
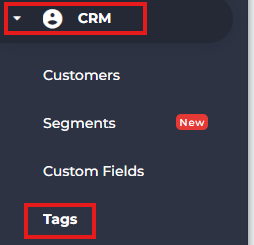
- Click Add Tag.

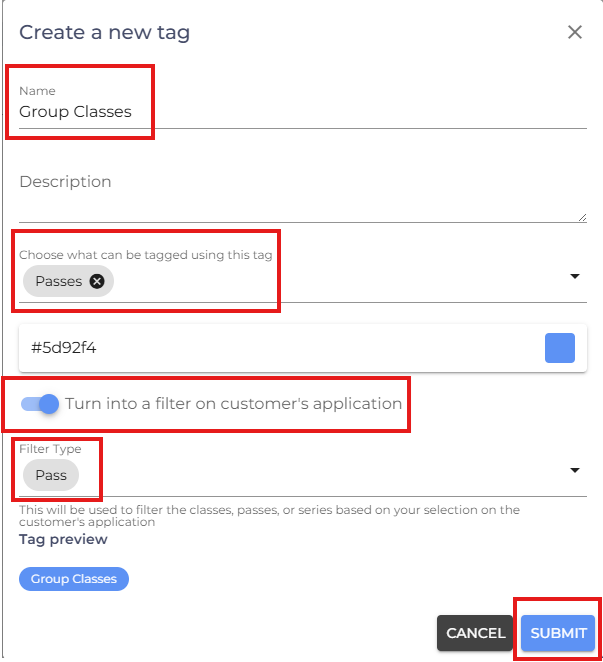
- Enter a Tag Name.
- Under Choose what can be tagged using this tag, select Passes.
- Enable the Turn into a filter on Customer Application option.
- Under Filter Type, select Pass.
- Click Submit to create the tag.
Assigning the Filter to a Pass
Once the filter has been created, assign it to a pass by following these steps:
- Navigate to Passes.
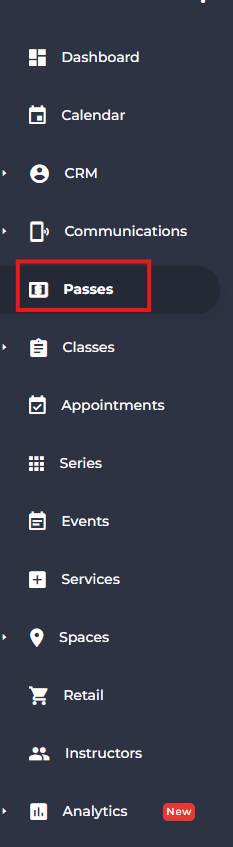
- Click Add New Pass

- In the Customer Portal Filters section.
- Select the filter you created.
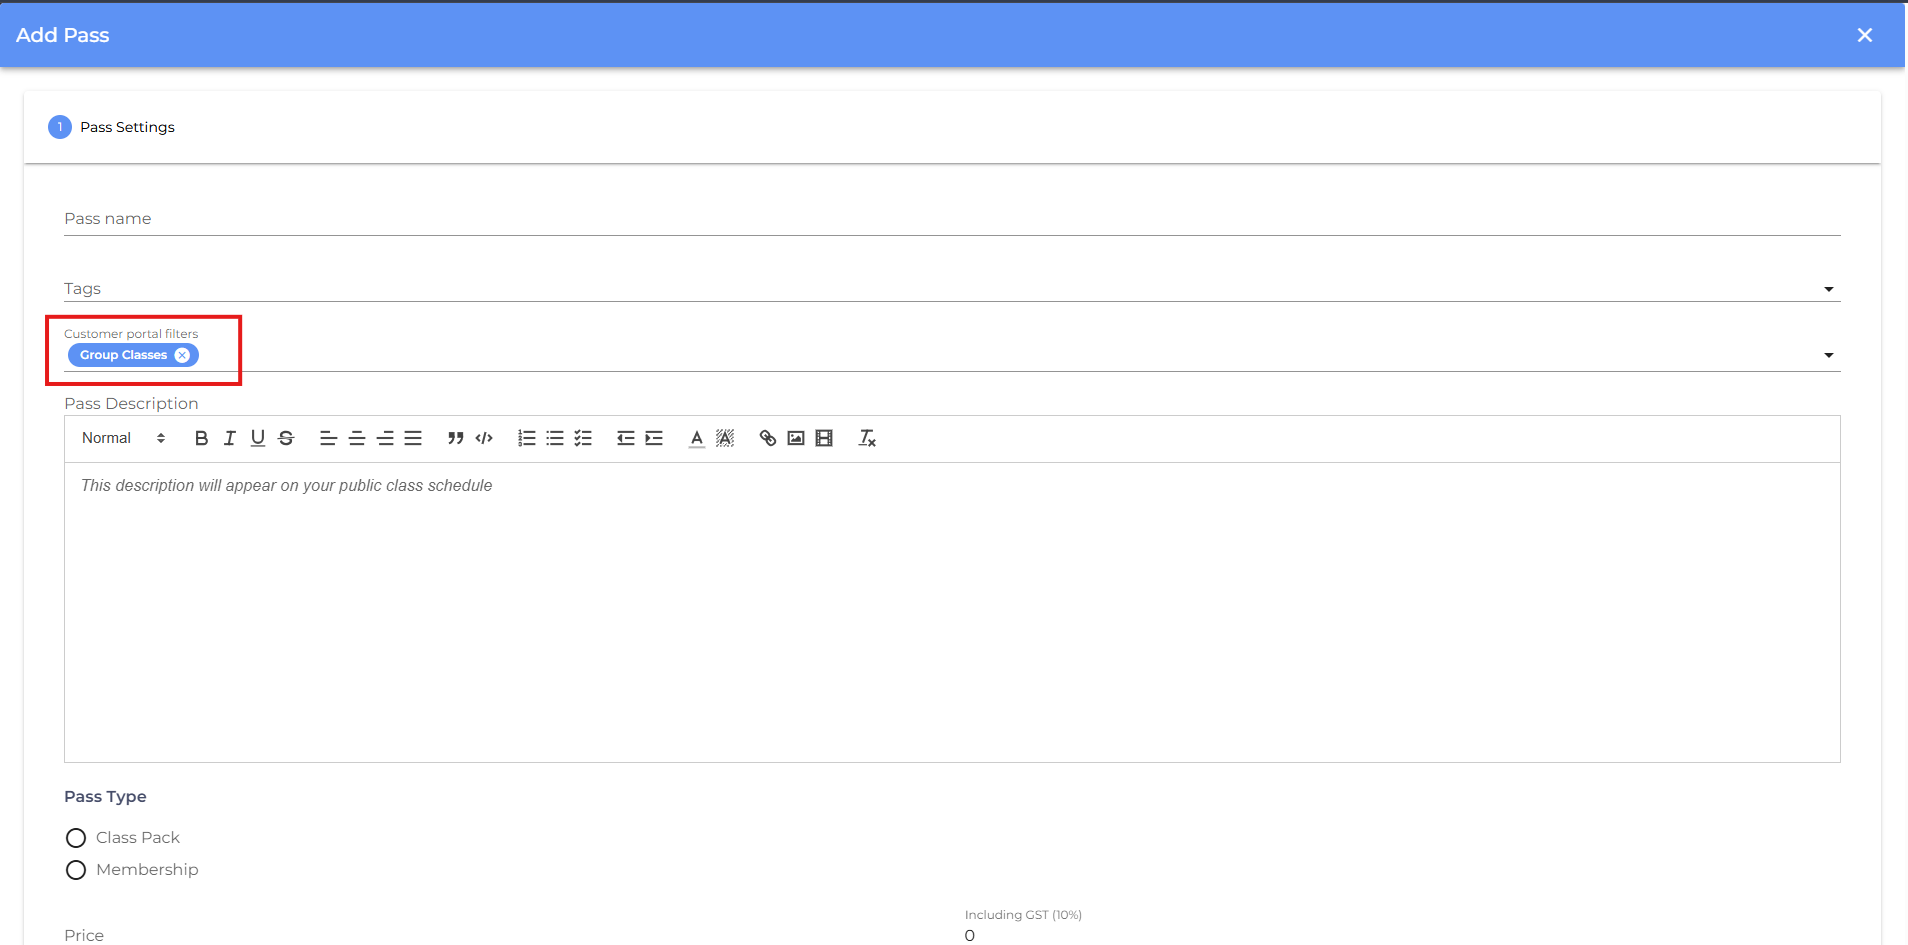
- Enter the required pass details and click Submit to complete the pass creation process.
The assigned filter will now be available in the Customer Portal, allowing customers to filter and browse passes more efficiently.
- If you are facing any difficulties, get in touch with us via help.studiogrowth.com and we'll help you to get up and running in no time.